Saturday, May 30, 2009

Useful Kitchen Tools

So I thought that it might actually be useful to show what types of tools that are essential to your kitchen if you want to make great pastries. You don't have to have a ton of fancy equipment though you would think that in order to make these great cakes and pastries like the ones you see them make on TV it's actually quite the opposite. There are only a handful of essentials that you must have.

First, a must is a stand mixer. My favorite the KitchenAid stand mixer (Show Below).


It's a bit pricey, but there are a variety of colors and styles. The price range, depending where you go and whether they're on sale or not, can range from $200 - $600. It sounds almost ridiculous to be paying that much for a mixer; however, I cannot stress this enough, it is one of the best investments I have ever made. They also have attachments that you can purchase, from ice cream makers, juicers to meat grinders and pasta rollers. There are also different paddle attachments that come with the mixer including the paddle for making doughs, a whisk and a hook for bread.

Because it is a bit pricey, and you don't want to wait to save up for one, a good alternative is KitchenAid's and mixer, which is also a good choice.

I'm really not trying to advertise for them, but this is the most useful tool. For more information, you can go their website.

Before I get too far ahead, I'm almost certain that you already know that you need measure cups and spoons. Those should be basics that everyone already has so I'm going to just skip ahead to the next most important tool.

Some of things that is almost a must have in the kitchen are baking pans! It's almost a must to have one of each of these items in order to make an assortment of pastries though it most certainly would be nice to have an all in one pan like the KitchenAid mixer which is pretty much an all in one mixer. That way, you storing all these pans would be less of a pain.

When choosing your pans, go for the commercial ones that are made of aluminum for better results. NOT the darker nonstick pans. If you use nonstick pans, your baked goods turn out a darker color. Okay, at this point I'm also guessing that you're thinking, "Ugh, that means I gotta scrape and clean those baking pans when I'm done!" But guess what? WRONG. If you properly grease your pan or line it with parchment paper, cleaning will be a breeze. Just soak it with water, or you can even add some dishwashing liquid to help it degrease and "voila!" you're done!

Now that I've explained the basics of how to choose your baking pans, pictured below are the types of pans you should have.

A spring form pan (to make cheesecakes)

A bundt pan
A loaf pan
A tart pan
A muffin pan
A round cake pan (having 2 may be useful when making layer cakes)
A cookie sheet
A cooling rack
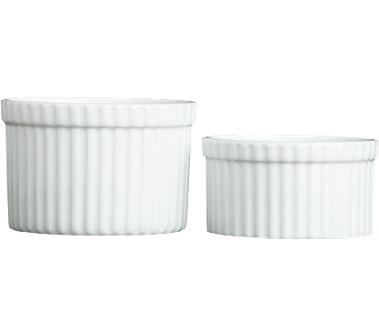
Ramekins
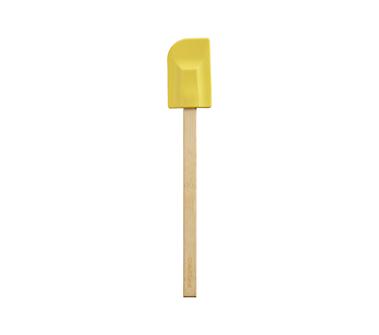
Spatulas

Also among other things, having a food processor is also handy for making pastry doughs like tart crusts and such.

The list could go on and on but those are the most basic tools. But really, once you get started, you'll end up collecting them so there's no need to buy them all at once.

Until then, good luck!

Thursday, May 28, 2009

Green Tea Cheesecake


So, one day my mom comes home and tells me, "you should make a green tea cheesecake" and I thought about it and was like, "sure why not" since it's not something you could typically find in your local grocery store.

I went to a Japanese supermarket and bought a bag of green tea powder determined to make this cheesecake without an actual recipe. So after doing a bit of research, I came up with the recipe below.

I'm still working on improvements for this recipe so I may update it later on but for now, it's good enough that's worth a try.

For the crust:

1 package (10 large crackers) graham crackers crushed
1 tbsp granulated sugar
3 tbsp butter melted

Preheat oven to 350 degrees and grease a 9in spring form pan. Line the bottom of the pan with parchment paper.

Place graham crackers in a ziplock bag and seal. Use a rolling pin (any thing else heavy will do) and smash the graham crackers until crushed. (Alternative: you can also purchase graham cracker crumbs but they cost a lot more) Place the the crushed graham crackers, sugar and melted butter into a small mixing bowl and combine.

Pour the crust mix into the prepared pan and compress the mix onto the bottom of the pan so that it becomes hard. Place the crust into the oven and bake for 15 minutes until golden brown.

For the filling:

4 - 8oz boxes of cream cheese
1 1/2 cups granulated sugar
2 tbsp green tea powder + extra for dusting
4 eggs

Place the cream cheese in an electric mixer and beat on medium high until smooth and creamy. Next, add the sugar and green tea powder and beat until smooth on medium. Add the eggs one at a time and beat until creamy.

Wrap the bottom of the prepared pan with foil, to cover the bottom and the sides. Place the pan in a roasting pan. Pour the batter into the prepared pan. Add boiling water about 1inch up the sides of the roasting pan. Place the pan into the oven and bake for 40 minutes, until the top turns a golden brown.

Take the cheesecake out of the oven and cool for an hour and place in the refrigerator to chill for at least 4 hours. It's best to chill overnight. When ready to serve, take a paring knife in the sides to loosen the cheesecake out of the spring form pan. Remove the cake from the parchment paper and place on a serving plate.

For garnish (not shown above):

1 cup frozen raspberries
1/4 cup granulated sugar

Place raspberries and sugar into a small saucepan and bring to a simmer on low heat. Stir occasionally until mixture becomes a sauce. Pour the sauce into a strainer to remove seeds from raspberries. Let cool and refrigerate. Drizzle over cheesecake to garnish.

Raspberry syrup may be prepared ahead of time.